Tutorial
This short tutorial will show you how to create your first shortcut with ShortKeeper. Let’s say you would like to create a shortcut to launch Google.
Note: ShortKeeper includes AutoHotkey (as a shortcut processor). At the end of this tutorial, you could close ShortKeeper, and AutoHotkey will continue processing your keyboard shortcut(s) in the background. ShortKeeper is only needed to add/modify/delete shortcuts, manually start/stop AutoHotkey, and set certain operating options.
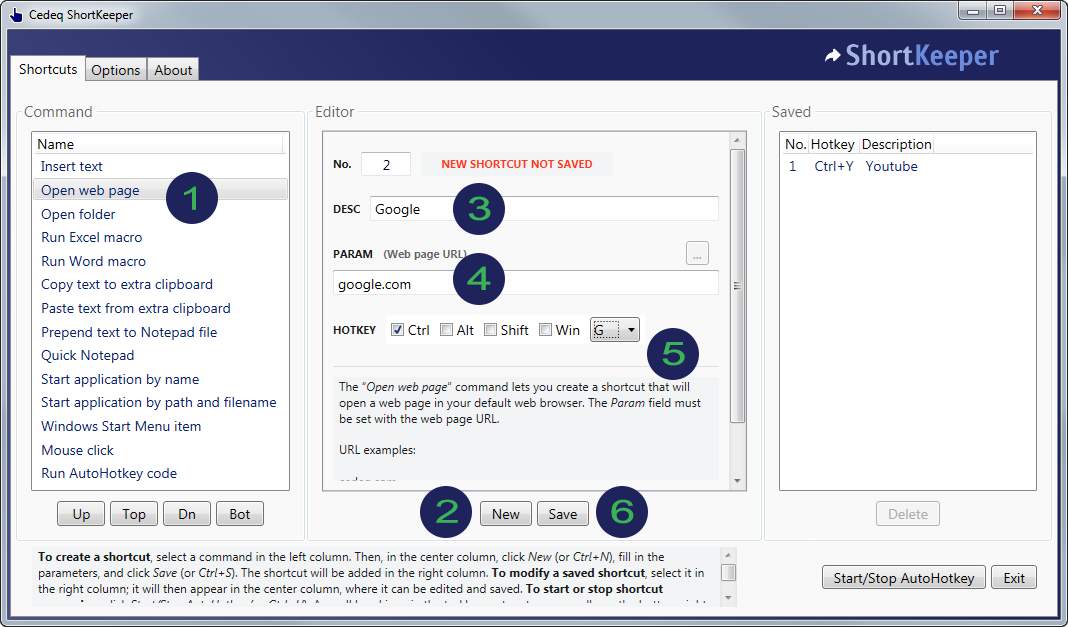
- In the left column, select the command “Open web page”.
Note: The order of commands in the list can be changed. The Up/Top/Dn/Bot buttons at the bottom of the list let you move up your most useful command(s).
- In the center column, click the button New.
Note: If you don’t click New you will be editing the selected shortcut in the right column instead of creating a new one.
- In the DESC field (center column), type “Google”.
- In the PARAM field, type “google.com”.
- In the HOTKEY section, click Ctrl and select G.
- Finally, click Save.
That's it! Pressing Ctrl+G will launch Google with your default web browser (if AutoHotkey is running).
If AutoHotkey is not running, just start it with the Start/Stop AutoHotkey button. It is possible to set an option (in the “Option” tab) to start AutoHotkey automatically at Windows start-up. There is also an option to start AutoHotkey automatically when ShortKeeper starts. A small hand icon in the system tray, usually at the bottom right of the screen, will indicate that AutoHotkey is active.